Photo 1
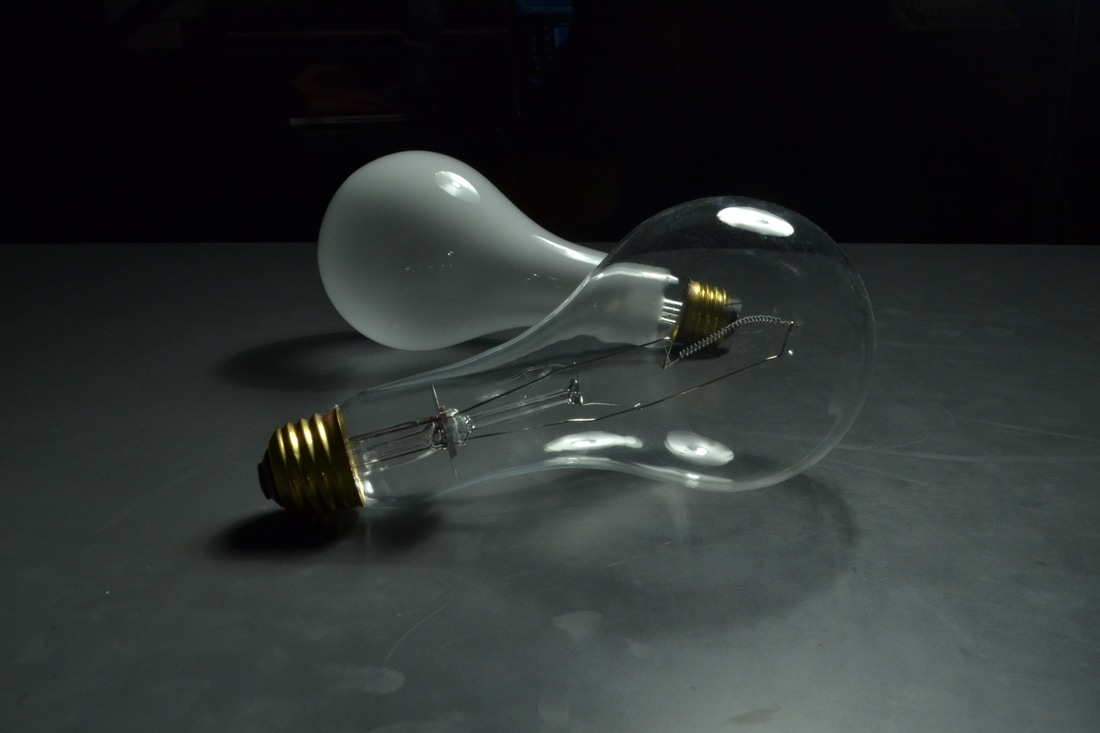
This photo was taken for the Aperture assignment. What I enjoy about this photo is the way that you can see through the first light bulb to the second. The ISO was set to 3200 because the camera was under the bright light inside. When I took this photo into Photoshop, I adjusted the levels. This photo adds a creepy look, since the background is all black and makes it look mysterious.
Photo 2

This photo was taken for Line and Shape. What I enjoy about this photo is the positive and negative space that you can see throughout this picture. The depth of field is shallow; the lake is in focus and the trees are out of focus. The ISO was set to 1600 and the white balance is cloudy. When I took this photo into Photoshop, I made the photo black and white and adjusted the levels. I chose this photo for my portfolio because it shows a good representation of negative and positive space. Also, this photo is strange because of the darkness that you can see in the background, making it look like something creepy is about to happen.
Photo 3
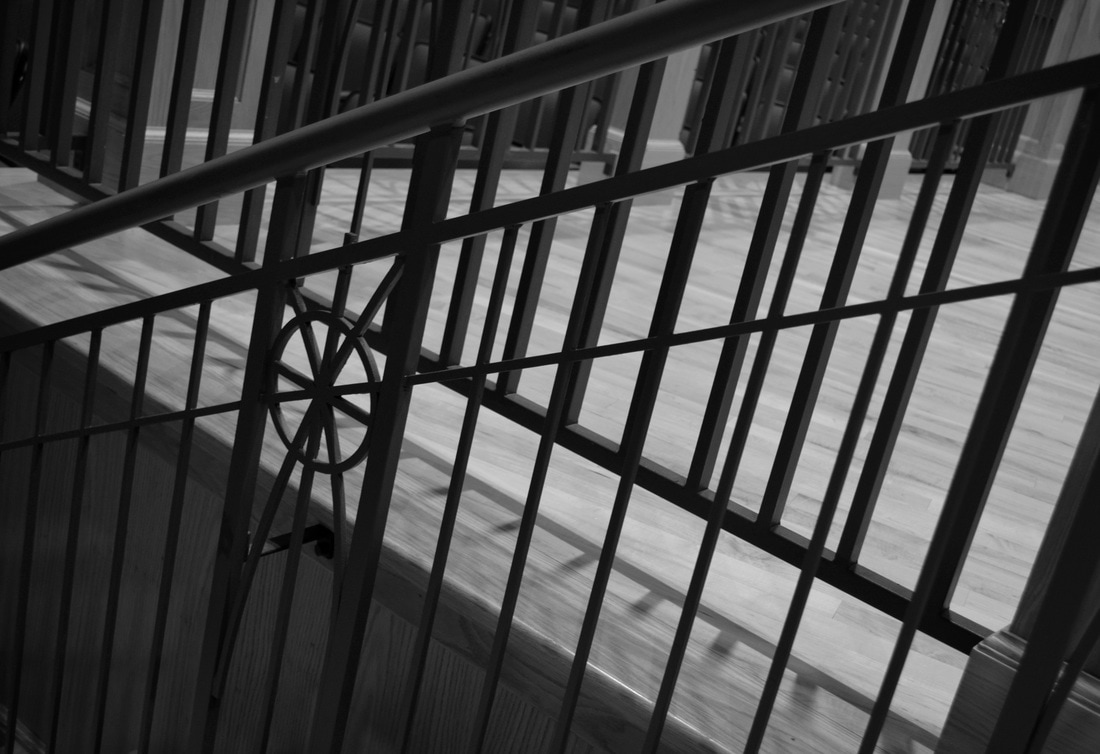
This photo was taken for pattern and texture. What I enjoy about this photo is the leading lines through the railing. The ISO was set to 3200 and the white balance was set to fluorescent. Everything happens to be in focus in the picture. My point of view was looking down on the top stair. When I took this photo into Photoshop, I cropped the picture to have just the railing be your point of view. I made this picture black and white and adjusted the levels. I chose this photo for my portfolio because, it seems to be a really good representation of leading lines through all of the railings.
Photo 4
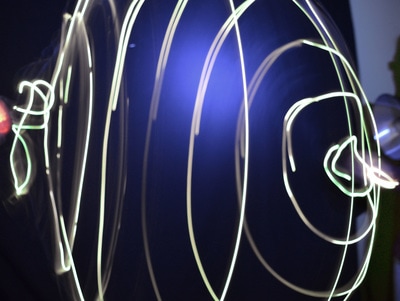
I took this photo for painting with light. What I enjoy about this photo is the pattern that is being shown since 2 people are swinging the lights. My point of view was even to the objects. When I took this photo into Photoshop, I cropped the two people swinging the lights out and adjusted the levels showing just the lights in focus. There is a large amount of negative space between the lights. I also changed the color of the lights to green when I took this into Photoshop.
Photo 5

I took this photo for motion. What I enjoy about this photo is how Devon looks like he is frozen in mid air, giving the picture a meaning. The ISO was set to 400 and the white balance was set to sunny. My point of view was looking up at Devon from below. When I took this photo into Photoshop, I cropped the negative stuff out of the photo and made the photo black and white. I raised the levels to add more of a darkness on Devon.
Photo 6
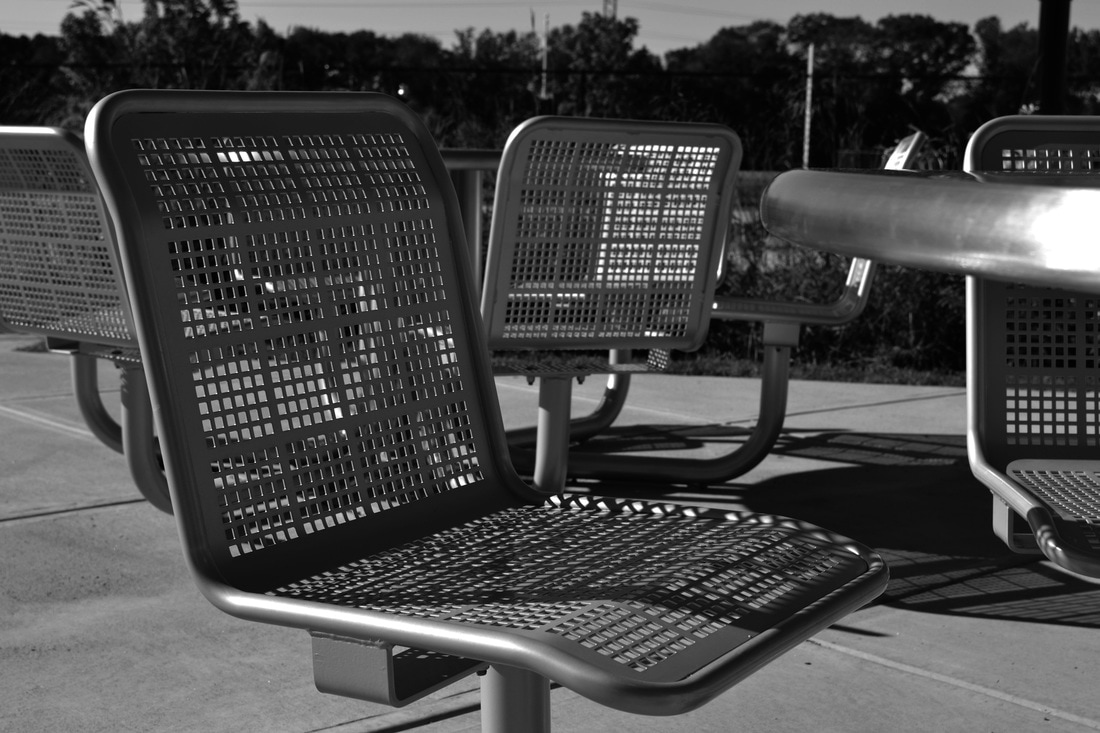
I took this photo for Line and Shape. What I enjoy about this photo is the leading lines throughout the chair and the positive and negative space between the chair and the trees in the background. The ISO was set to 400 and the white balance was set to shade. I made this photo black and white in Photoshop because I felt that making this photo black and white would have gave more of a meaning than if it was just in color.
